Downgrading from Windows 11 to Windows 10 can feel overwhelming. Many users worry about losing important data or dealing with headaches if the downgrade fails. However, the process is much simpler than it seems. Anyone can safely downgrade to Windows 10. Even if they lack in-depth knowledge of Windows.
This step-by-step guide helps users choose the most suitable method for downgrading from Windows 11 and returning to Windows 10. From finding the rollback option to preparing backups and performing a clean installation of Windows 10, we've got you covered.
Key Takeaways
- Users may want to downgrade their PC to Windows 10 for numerous reasons, including performance or personal preference.
- It is possible to restore a previous Windows version after upgrading to the latest release.
- The best method for downgrading to Windows 10 depends on the time elapsed since installing Windows 11.
- Microsoft gives users the option to roll back to Windows 10 within 10 days. After that period, you can still downgrade using Windows installation media.
Can I Revert to Windows 10?
Yes.
Users can always reinstall Windows 10 on their desktop or laptop if they are unsatisfied with Windows 11. The ease of doing so depends on several factors, though. Many users choose to reverse the upgrade within the first 10 days. In that instance, Windows provides a built-in feature to restore the older version. Beyond that period, you will have to install Windows 10 from scratch.
Why Downgrade to Windows 10?
People may have different motives to switch back to Windows 10.
Some users prefer the familiar functions and interface of Windows 10. Others could have compatibility and performance issues with Windows 11. Or they may have privacy concerns over new features.
Whatever the reason, users can remove Windows 11 from their system and resume running Windows 10.
Can I Downgrade Without Losing Data?
Yes.
It is possible to downgrade to Windows 10 without losing data. Windows saves its system files, installed programs, and user data to a folder when updating the PC.
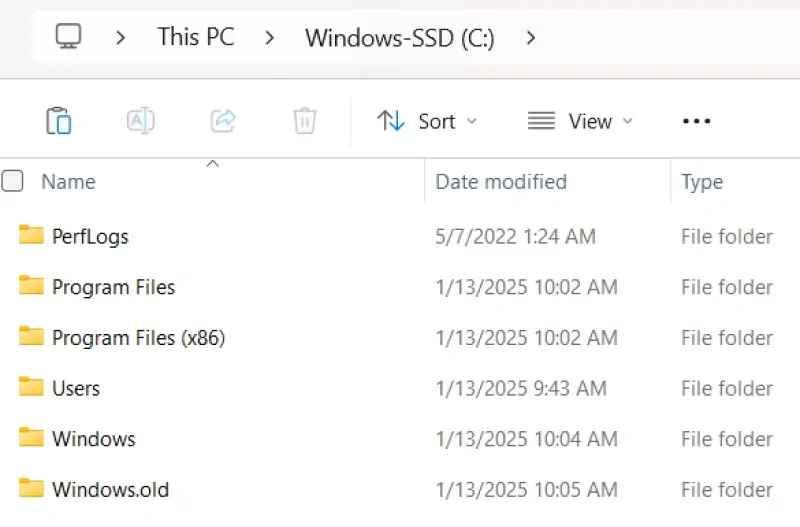
The Windows.old folder contains a snapshot of all data from the previous version of the OS. In many cases, Windows will restore the files in the folder upon downgrading.
If you opt for a clean install of Windows 10, you will need a working backup to avoid data loss.
However, regardless of the method, users should back up data before downgrading from Windows 11.
Errors can happen. Mistakes are made. Prepare for the worst and protect critical files by backing up your PC.
Back Up Your Data Before Downgrading to Windows 10
Choose one of the following backup strategies:
- Use Microsoft’s Windows Backup and Restore tool to create a system image on an external hard drive.
- Download third-party backup software that supports disk cloning and system restoration.
- Save specific files on a cloud storage platform like OneDrive, Google Drive, or Dropbox. These services cannot back up system files, settings, apps, or entire partitions.
The choice ultimately comes down to whether you need a full system image or only a few important files.
Methods to Downgrade From Windows 11 to Windows 10
As mentioned, there are two methods to downgrade to Windows 10.
The easiest method involves selecting the rollback feature in Windows 11 within the given period.
The second method requires users to perform a clean install of Windows 10 on their computer.
Below, we explain each process so you can downgrade from Windows 11 to Windows 10 with confidence.
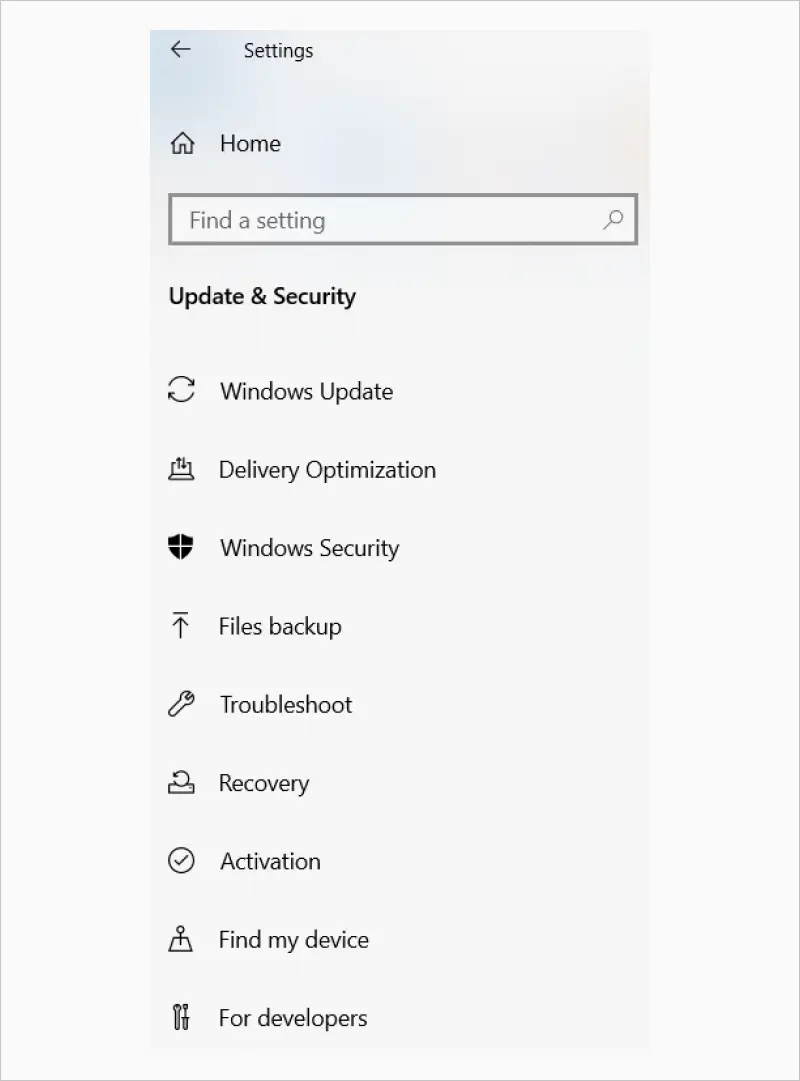
Note: Ensure that you have a valid product key for Windows 10. Without a key, you may be unable to activate the downgraded system. Windows will automatically activate if you have a digital license linked to your Microsoft account. Users without the license likely need to manually change or enter their key under the Update & Security menu in Settings.
Method 1: Downgrade Within the Windows 11 Rollback Period
Microsoft offers users the option to restore Windows 10 if they’re within 10 days of upgrading to Windows 11.
Here is how to roll back to Windows 10 using this method:
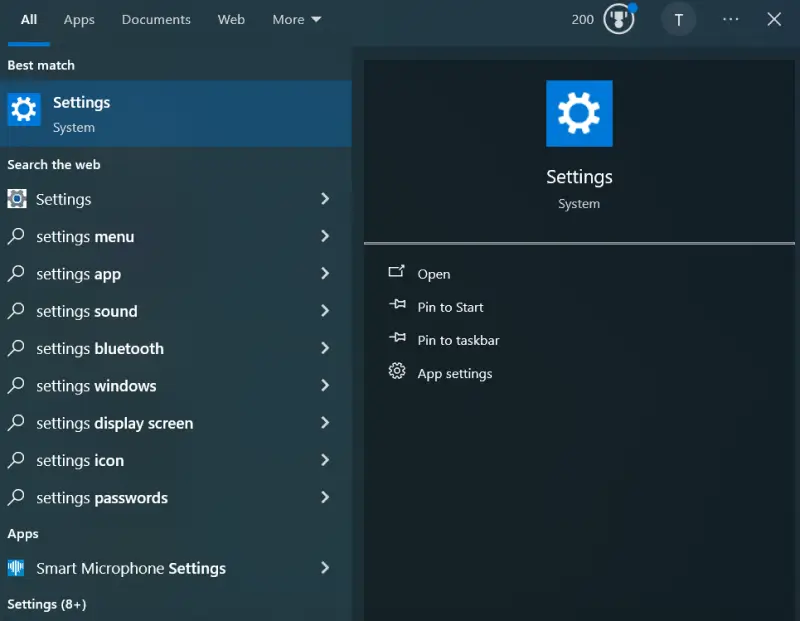
- Enter Settings in the Windows search box and launch the app.
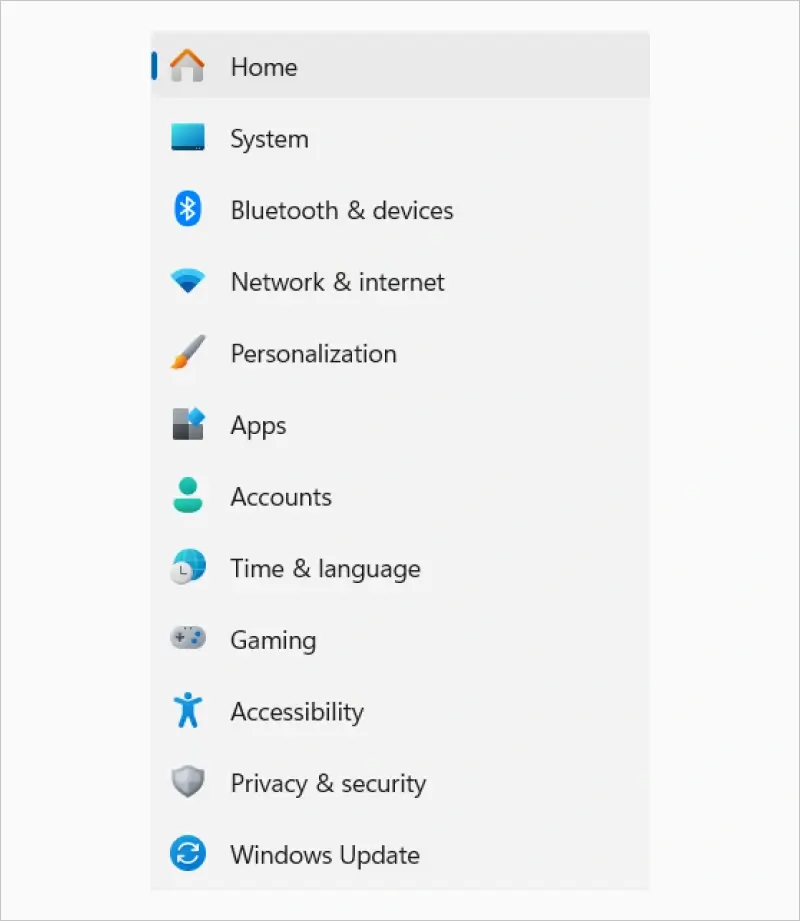
- Click System in the left sidebar.
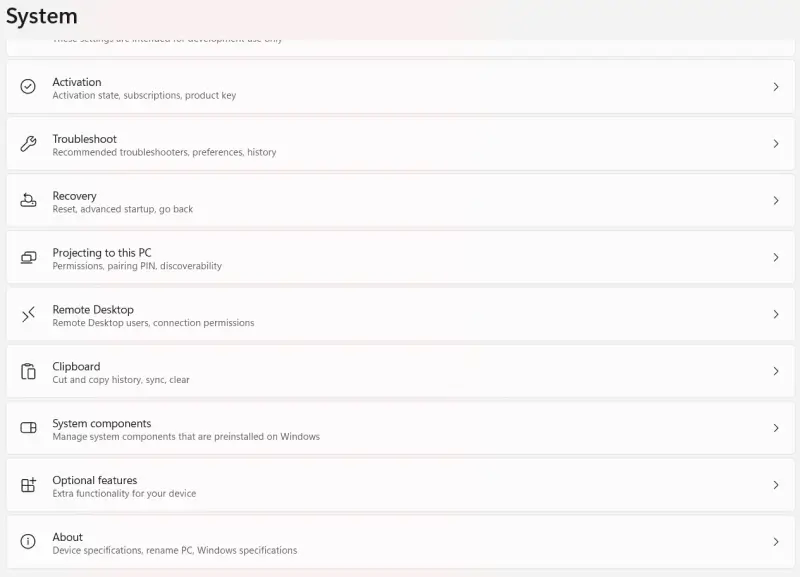
- Select Recovery from the System menu.
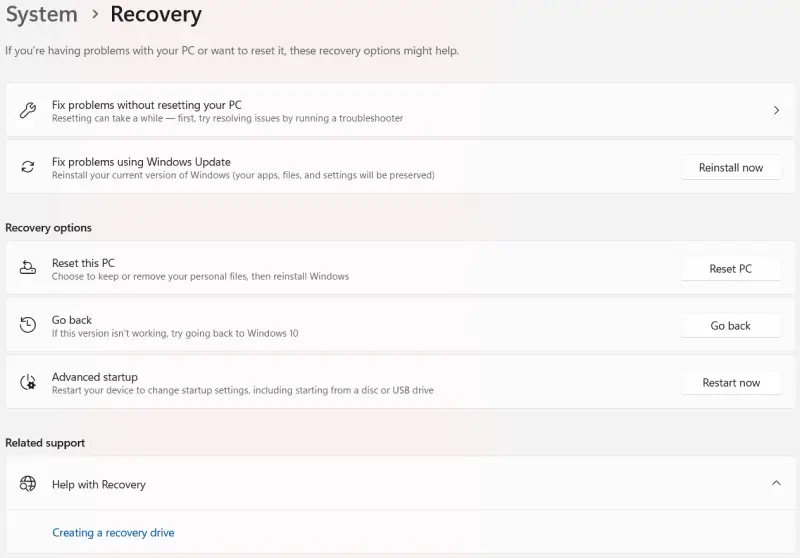
- Click Go back in Recovery options.
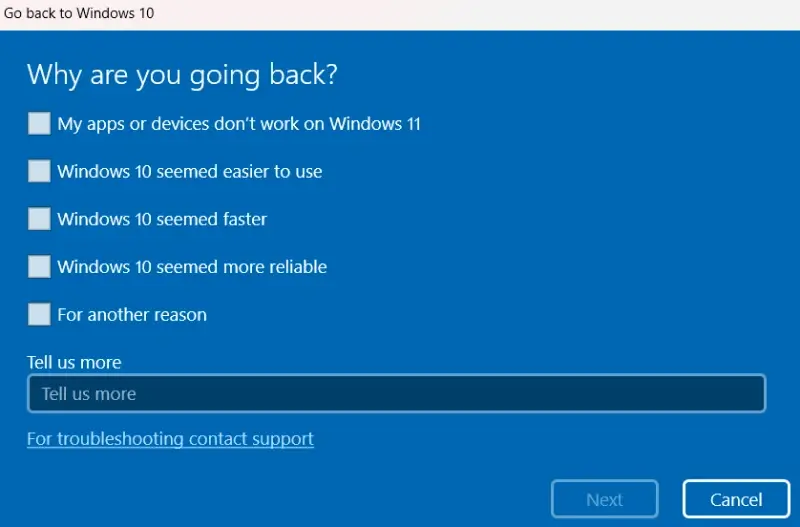
- Choose your reason for downgrading from Windows 11 and select Next.
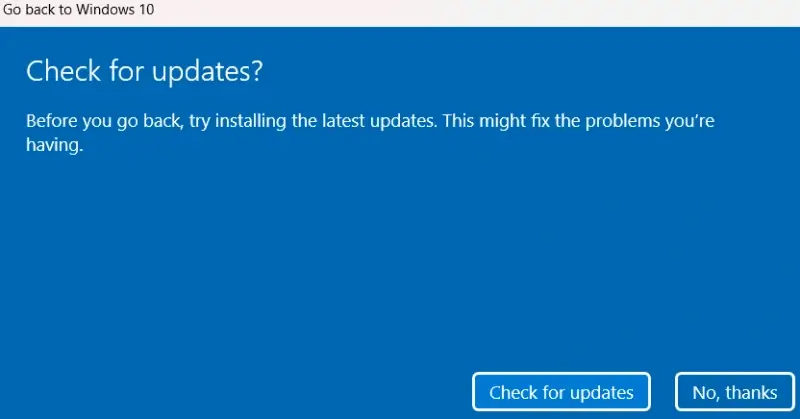
- Click “No, thanks” if you want to ignore Microsoft’s suggestion to check for updates.
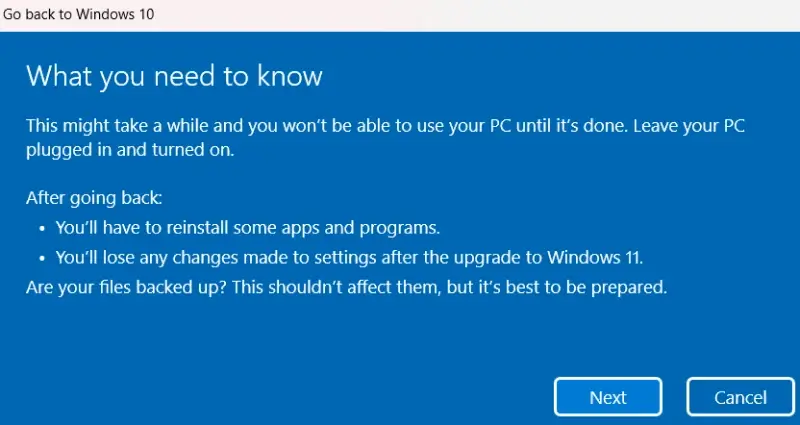

- Read the on-screen notes about downgrading and select Next.
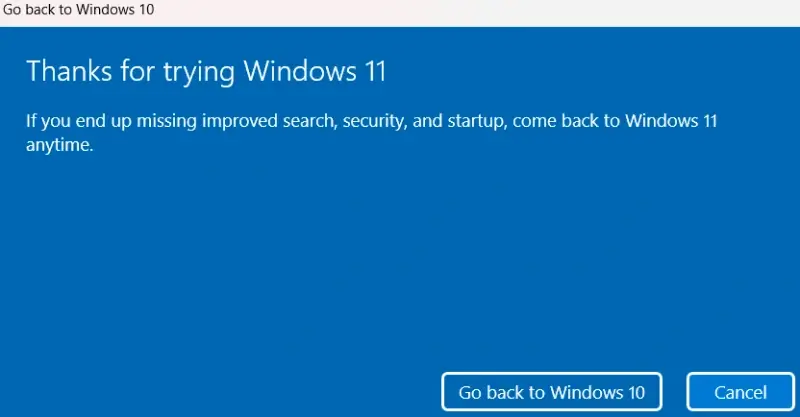
- Click Go back to Windows 10.
- Wait for the downgrade to finish. Your PC will restart several times throughout the process.
Once the rollback is done, review your system settings and reinstall any programs if necessary.
It is that simple.
Method 2: Use Windows 10 Installation Media
If the 10-day period has passed, users must use installation media to downgrade from Windows 11. The following steps outline the process.
Step 1: Create a Backup
Make sure to back up all important data before proceeding. Check the backup strategies listed above for insights.
Step 2: Download Windows 10
- Visit Microsoft’s website to download Windows 10.
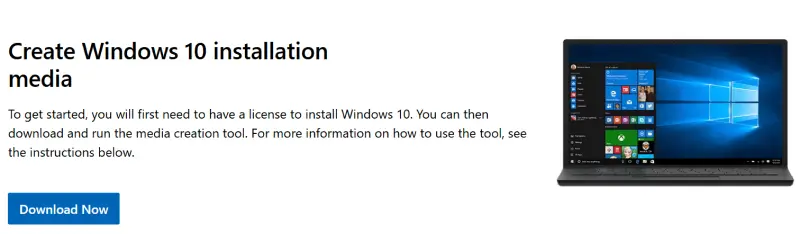
- Click Download Now.
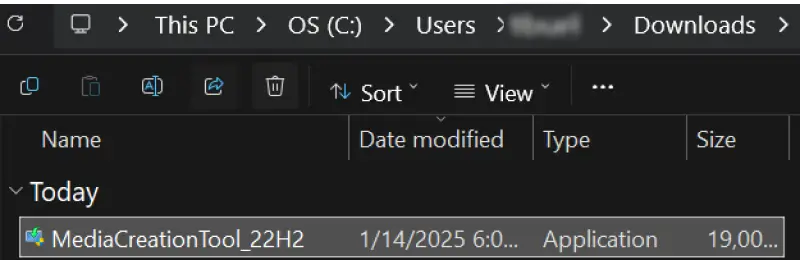
- Go to the download folder and run the Media Creation Tool.
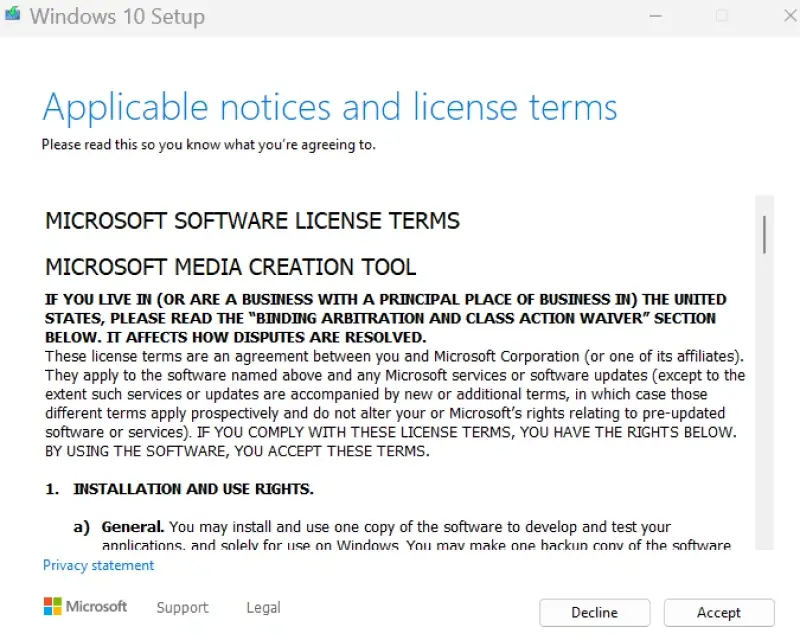
- Accept the license terms.
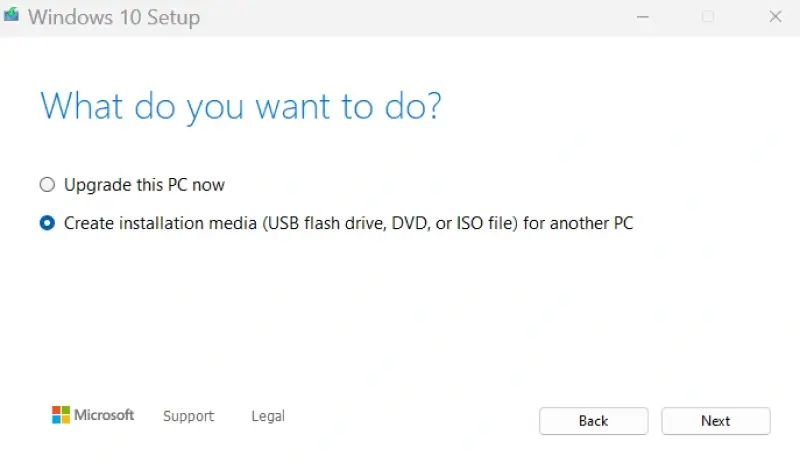
- Choose “Create installation media (USB flash drive, DVD, or ISO file) for another PC”.
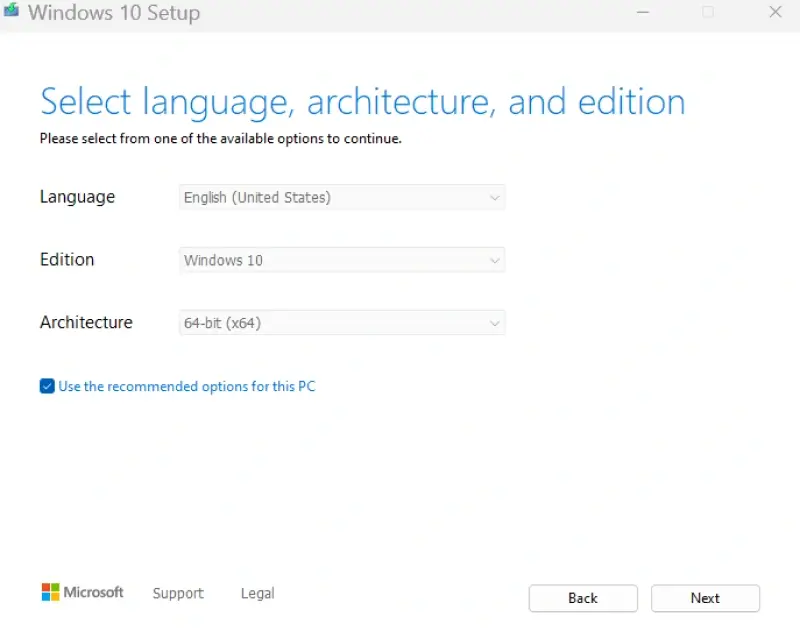
- Select the preferred language, edition, and architecture (64-bit or 32-bit).

- Choose either USB flash drive or ISO file for the desired media. You will need to burn the ISO file to a disc later.
- Continue to create a bootable version of Windows 10. The tool will overwrite the flash drive's contents, so back up its data first.
Step 3: Boot From the Installation Media
- Insert the bootable USB drive or DVD and restart the PC.
- Press the relevant key to access the BIOS or UEFI settings. The layout depends on your motherboard. Check the product manual for details.
- Navigate to the boot menu and move the installation media to the front of the order.
- Save changes and exit the BIOS or UEFI settings to boot from the flash drive or disc.
Step 4: Install Windows 10
- Choose the language, time and currency format, and keyboard or input method on the Windows Setup screen.
- Click Next.
- Click Install now.
- Enter your product key or select “I don’t have a product key” if you own a digital license.
- Select the Windows 10 edition to install.
- Accept the license terms.
- Choose “Custom: Install Windows only (advanced)”.
- Select the target partition for Windows 10. Overwriting a partition will result in data loss without a backup.
- Follow the on-screen prompts after the computer restarts to complete the setup.
You are all set once Windows 10 loads.
Common Issues When Reverting to Windows 10
The most common issues when downgrading to Windows 10 include:
- Missing Drivers: You may need to reinstall some drivers after downgrading. This issue occurs because newer hardware runs on software optimized for Windows 11.
- Activation Issues: Users will need a Windows 10 product key to complete the process. It should reactivate if you previously had Windows 10 on the same system.
- Data Loss: Accidents, glitches, and unforeseen disasters can still happen. Having multiple backups helps safeguard against sudden data loss.
How To Update Software and Reinstall Drivers After Downgrading
The solution is usually simple if you encounter problems after downgrading from Windows 11.
To update to the latest version of Windows 10:
- Enter Settings in the Windows search box and launch the app.
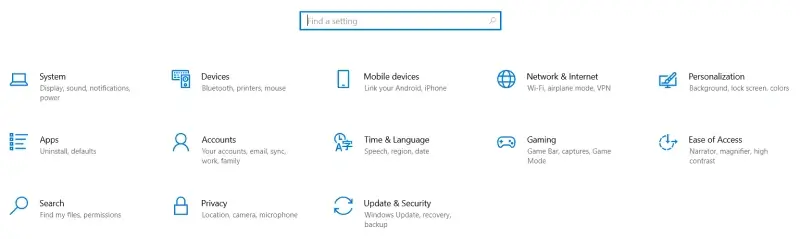
- Select Update & Security.
- Choose Windows Update from the menu.
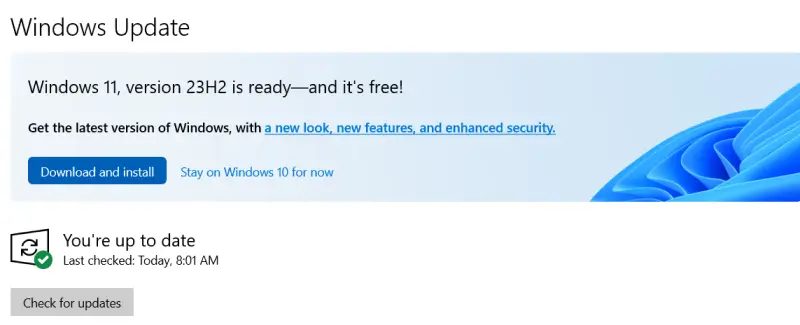
- Click Check for updates.
- Download and install available updates.
- Restart the computer when prompted.
To update incompatible drivers:
- Enter Device Manager in the Windows search box and launch the app.
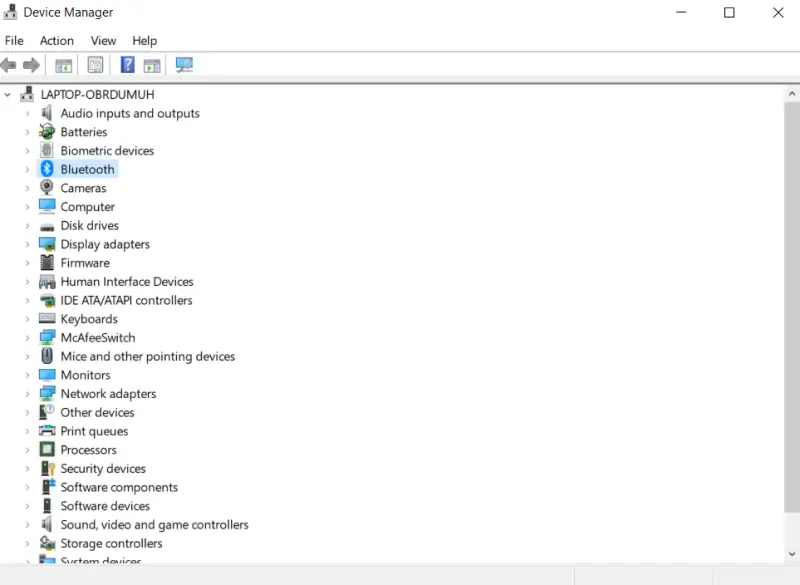
- Locate the category and device within the menu.
- Right-click the desired hardware.
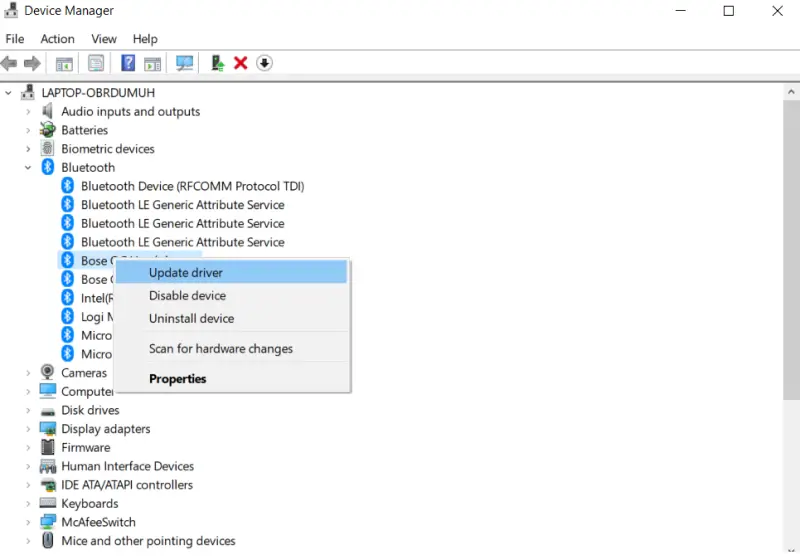
- Select Update driver.
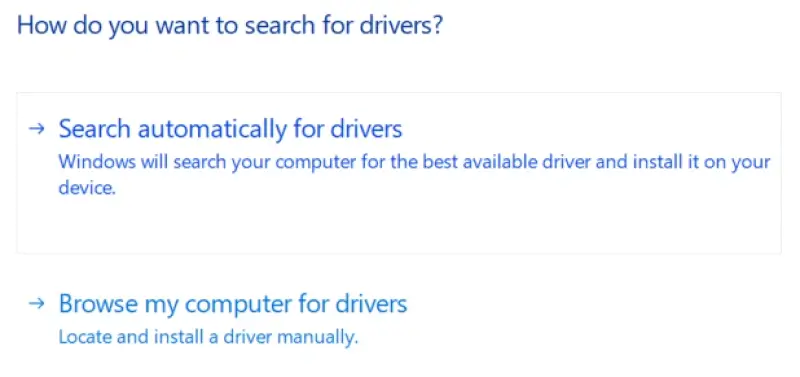
- Choose “Search automatically for drivers”.
- Follow the on-screen instructions.
You can use the original files or app store to reinstall specific programs that did not survive the switch back to Windows 10.
Things To Consider Before Downgrading to Windows 10
While Windows 10 is a popular operating system, there are a few reasons why you may stick with Windows 11.
Users should weigh the following factors before downgrading from Windows 11:
- Compatibility: Third-party developers may have built new software to run on Windows 11. As a result, it might not function on Windows 10.
- Features: Windows 11 is equipped with AI-powered tools, more integration, and a redesigned interface.
- Support: Windows 10 reaches the end of its lifecycle on October 14, 2025. After that date, it will not receive regular updates.
If these factors do not impact you, continue the rollback to Windows 10. You can always upgrade to Windows 11 again.
If you lose data when downgrading to Windows 10, the certified engineers at Secure Data Recovery can help. Our data recovery services have recovered billions of files across thousands of cases involving many storage devices, failure types, and operating systems. We have the tools and techniques to restore data in almost any situation. Trust the experts with free quotes and a No Data, No Recovery Fee guarantee.
Call 800-388-1266, request help, or find a location to get started.
Frequently Asked Questions
How can I downgrade from Windows 11 to Windows 10?
You can go back to Windows 10 using the built-in rollback option within 10 days of upgrading. Otherwise, you can downgrade from Windows 11 with a clean install of Windows 10. In that case, you must back up your data, as the process will overwrite the original files.
Can I downgrade to Windows 10 without losing files?
Yes. In most instances, the system will keep stored data from the previous version of Windows. The rollback feature lets users easily restore Windows 10 without losing data. However, maintaining backups is the best way to avoid data loss, regardless of your chosen method.
What happens after the 10-day rollback period ends?
You can still downgrade from Windows 11 after the 10-day period. Users must download Windows 10 and create a bootable USB flash drive or disc using the Media Creation Tool. As mentioned, creating a backup is essential to preventing data loss during a clean install.
Do I need to reinstall drivers or software after downgrading?
Sometimes. Certain software was designed to run on Windows 11. You may need to reinstall it after returning to Windows 10.
Is it safe to use Windows installation media?
Yes. You can safely use installation media to revert back to Windows 10 without losing data. Simply ensure you have all your files backed up and follow the steps above.