If your Asus laptop has suddenly stopped cooperating and won’t turn on, there are many potential solutions to try. Whether you’re dealing with a simple power supply problem or a more complex software glitch, many issues can be resolved with a few straightforward troubleshooting steps.
In this guide, we’ll get into the most common reasons why your Asus laptop won’t turn on and offer step-by-step solutions to get it up and running again.
If, in the process, you realize you’re dealing with data loss due to more serious hardware issues, you can always reach out to Secure Data Recovery for our expert hard drive recovery services.
Why Is Your Asus Laptop Not Turning On?
If your Asus laptop refuses to boot up, there can be a variety of culprits, ranging from power supply issues to hardware or software malfunctions. Pinpointing the root cause is crucial for finding an effective solution. Here are some of the most common causes:
- Power supply problems: A faulty charger or a drained or damaged laptop battery can mean your laptop is not charging and is prevented from getting the amount of power it needs to start.
- Loose or damaged power connections: If the power cord or AC adapter is loose or damaged, it can disrupt the flow of electricity to your laptop, resulting in no power and a laptop that won’t turn on.
- External device interference: Devices like USB drives or printers can sometimes interfere with the system’s startup sequence.
- Hardware configuration issues: Incorrectly installed or incompatible hardware components can cause startup failures.
- Software errors: Issues with the graphics driver can disrupt the display or lead to crashes during startup.
Symptoms and Fixes When Your Asus Laptop Won’t Turn On
It bears repeating — knowing the root cause of the issue is the first step to get your laptop up and running again. Here are some common causes, including symptoms to look out for, and corresponding fixes. You can jump to the section that best matches what you’re dealing with.
Symptom: There’s No Display or Power Indicator Light
This usually indicates a power supply or battery issue, meaning your laptop isn’t receiving power at all.
Solution 1: Check the Power Supply
First, make sure you’re using the original adapter and power cord that came with your laptop. Then, make sure the power connection is secure. You might want to plug in to a different outlet to verify that your adapter and cable are working.
Also, look for any damage to the adapter or cable. If you find any, it’s best to get a replacement from an authorized vendor or service center.
Solution 2: Perform a Hard Reset
If fiddling with the physical power supply doesn’t work, try an Embedded Controller (EC) or Real Time Clock (RTC) reset. This can clear residual charge or reset hardware components that control your laptop’s power, resolving power-related issues.
Here’s how to do it:
- Disconnect external devices. Unplug or remove any external hard drives, printers, memory cards, CDs/DVDs, and dongles.
- Power off your laptop. If it’s on, turn it off.
- Disconnect the power adapter. Unplug your adapter to fully disconnect the power source, unless you have an Asus TP420IA or UX425IA model — you need to keep it plugged in to reset those.
- Press and hold the power button. Depending on the model, hold the power button for 20 to 40 sections. For models with a 20-second reset, the power indicator will start flashing after about 15 seconds.
- Reconnect and test. Plug the power adapter back in and turn on the laptop to see if your issue was resolved.
Symptom: There’s No Display, but the Power Indicator Light Is On
If the power light is on, that tells you that your laptop’s motherboard is receiving power. But something might be preventing it from starting up properly. This usually happens because of external devices or software issues. You can try disconnecting all external devices and trying an EC or RTC reset before moving on to the methods below.
Solution 1: Restore Display Settings
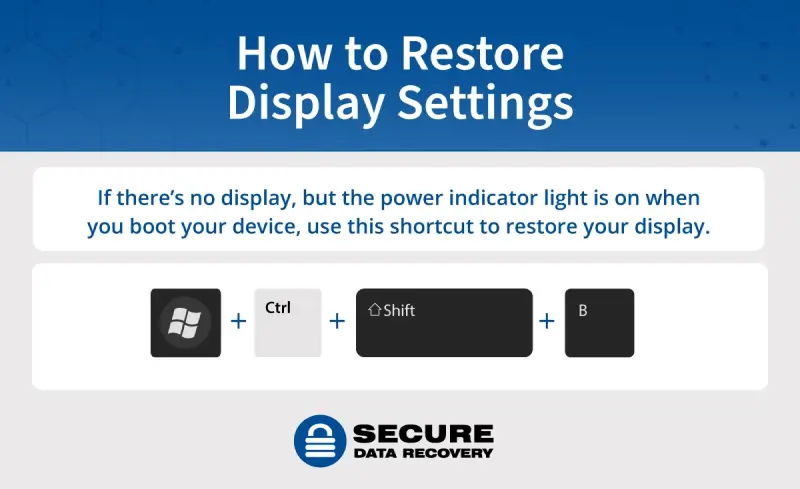
Press the Microsoft Windows logo key + CTRL + Shift + B to restore display-related settings and see if that resolves the issue.
Solution 2: Download and Install a Display Driver
If you restored display settings and it still won’t turn on, try connecting an external monitor to your laptop. You can switch the display to that monitor by hitting the Windows logo key + P. (If you don't have an external monitor or there’s no display, just move onto the next solution.) If the external monitor displays normally, you can download and install the latest driver.
- Search for myASUS in the Windows search bar and open the app.
- Click “System Update” and let the app scan for updates.
- Select the updates you want and click “Update Selected Items.”
- After they’re installed, check “Update History” to verify that they were successfully updated.
Alternatively, you can download the driver from the ASUS support site.
- On the site, enter your computer’s model name.
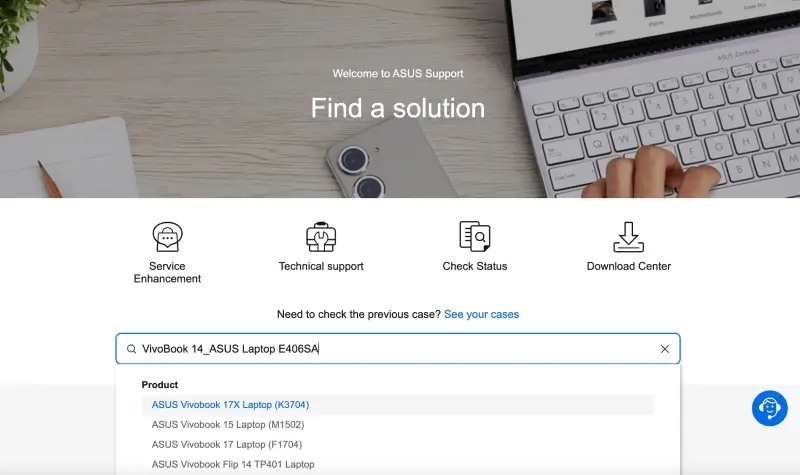
- Select “Support” and then “Driver & Tools.”
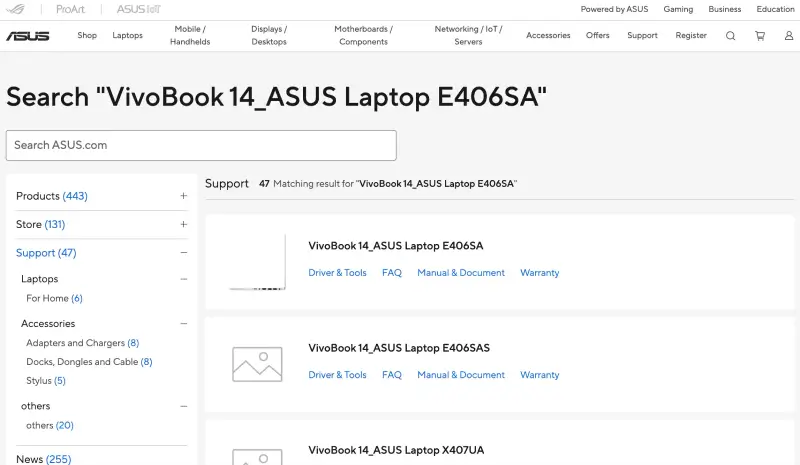
- Choose your model name and operating system.
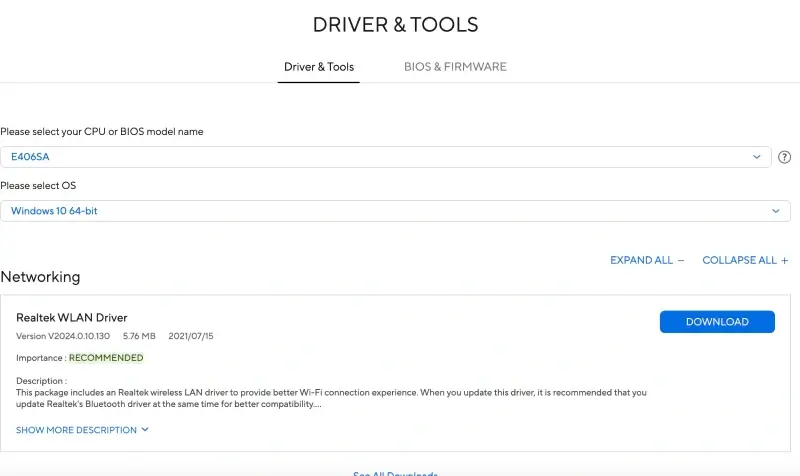
- Download the display driver and install it.
Solution 3: Update BIOS
If previous solutions haven’t worked, try updating the BIOS (not the BIOS settings, which is different) using BIOS recovery mode. Note that you’ll need another computer to download the BIOS file and a USB flash drive (formatted in FAT32 and 1 GB or more) to store it.
- Go to the ASUS support website and download the latest BIOS file for your model under ASUS EZ Flash Utility.
- Extract the BIOS file and rename it according to the ASUS instructions for your model. Typically the naming conventions are .CAP or .bin. Copy the file to the root directory of your USB flash drive.
- Connect the flash drive to the laptop that won’t boot up, then turn on your device and press F2 or Delete to enter the BIOS setup screen. Double check the correct key to use for your model.
- Navigate to the Advanced screen and click ASUS EZ Flash 3 Utility or ASUS Firmware Update.
- Select your USB device and the BIOS file. Then, confirm that you’d like to proceed with the update.
- Once your update is complete, your computer will reboot.
There are three BIOS setup screen interfaces: UEFI, MyASUS in UEFI, and legacy. You can review how to reset the BIOS on each interface here.
Solution 4: Perform a CMOS Update
If that doesn’t work, the next step is performing a CMOS reset to restore your computer’s hardware to its default state. Here’s the simplest way to do it:
- Power off and unplug your laptop.
- Press the MB Clear CMOS or CLR_CMOS button for 5 to 10 seconds.
- Plug the power cord back in and turn on the laptop.
- Follow the prompts to enter BIOS setup, load optimized defaults, and save your changes.
Some models may not have a CMOS button. If that is the case, you may need professional help to remove the CMOS battery.
Symptom: There’s White Text on a Black Screen
If you’re seeing white text on a black screen, it signals you probably had an interrupted BIOS update or a hardware configuration issue. Connecting to an external monitor can help you troubleshoot.
Solution 1: Run CHKDSK
If your hard drive is having issues, you might see an error message like “S.M.A.R.T. Status Bad, Backup and Replace, Press F1 to Resume…” during startup. Most modern hard drives come with S.M.A.R.T. (Self-Monitoring Analysis and Reporting Technology) built in, which can be a huge help in identifying and alerting you to hard drive problems on your device.
Pressing F1 (or any key) lets you bypass this error message, but if you don’t address the issue, it’ll probably persist, and you’ll see that screen every time you boot up.
You can check and fix disk issues using CHKDSK:
- To open “Command Prompt” type, type “cmd” in the search box, then click “OK.”
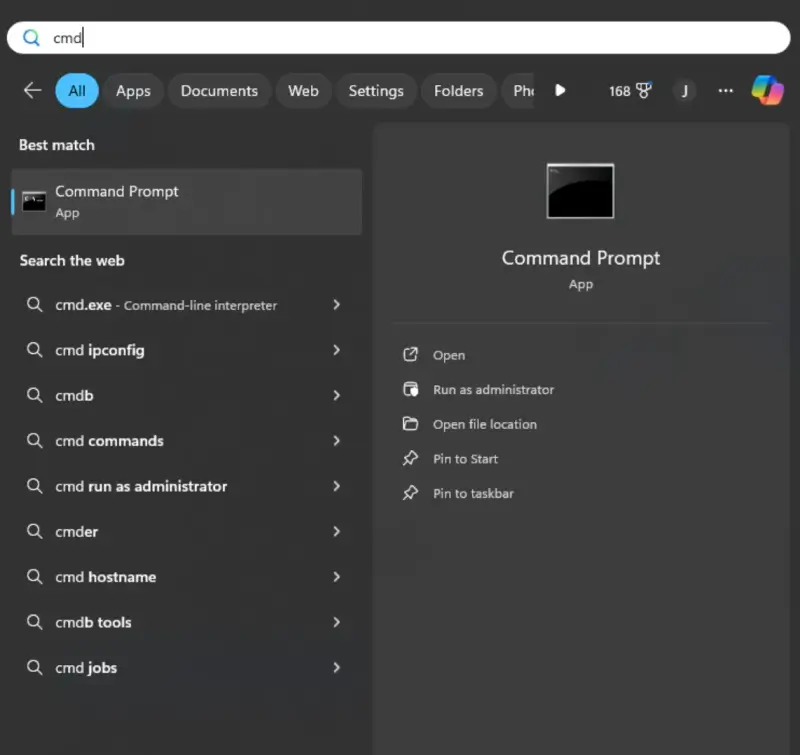
- In the results that appear right-click the command prompt app or “cmd.exe” — which one appears depends on your operating system.
- You should click “Run as administrator” from the drop-down menu that appears.
- Type in “CHKDSK /f” in the black window that appears and then press Enter.

- Once it’s running, don’t interrupt the process — CHKDSK can take a long time to finish, so let it do its thing.
While CHKDSK is generally safe to use, there’s a risk of it freezing. If you’re not experienced with this process, it’s probably best to reach out to a professional. And if CHKDSK runs successfully but doesn’t resolve the issue, back up your data and consider replacing your hard drive to prevent more damage.
Solution 2: Address Hardware Configuration Issues
The S.M.A.R.T. error message will usually tell you what hardware setting is causing the problem. You can follow the on-screen instructions to fix it. But if you’re not sure how to proceed, feel free to reach out to us for help with hard drive repair.
S.M.A.R.T issues can indicate that your hard drive is about to fail.
Symptom: The Device Shows a Blank Screen
A blank screen usually signals issues with the graphics card or the software that controls it.
Solution 1: Enter Safe Mode and Reinstall Graphics Drivers
Safe Mode starts Windows with only essential files and drivers, helping you isolate the problem. If the same problem persists even in Safe Mode, it’s probably not related to the graphics drivers.
To enter Safe Mode:
- Press and hold the power button for 15 seconds to force the laptop to shut down.
- Turn the laptop back on.
- Repeat steps 1 and 2 — force shutdown and restart two more times.
- Your laptop should automatically enter Windows Recovery Environment (WinRE).
- Select “Troubleshoot” and then “Advanced options.”
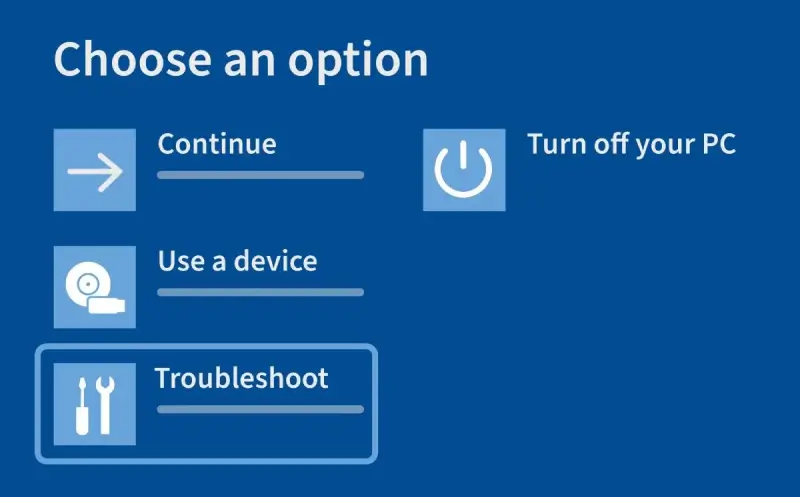
- Choose “Startup Settings” and click “Restart.”
- Press F4 or F5 to enter Safe Mode with or without networking.
- Press Windows + X and select the Device Manager. Then, uninstall the driver in question.
- Reboot your computer in Safe Mode and reinstall the newest driver from the manufacturer’s website.
If you’re not sure how to do this, review the previous instructions on how to download and install the latest drivers. You can check if your drivers are up to date by going to Settings > Update & Security > Windows Update.
If These Troubleshooting Options Don’t Work
If you’ve tried our troubleshooting solutions for your specific symptoms and they haven’t fixed the issue, try resetting the EC or RTC as described in the first section. If that doesn’t work and you still can’t power on your laptop, it’s time to seek professional help. Check if your laptop is under warranty and contact your local ASUS customer service center for tech support.
If you’re worried about losing your important data, contact us for data recovery services.
How to Keep Your Asus Laptop Running Smoothly
While there’s no guarantee your computer will function perfectly forever, being proactive and taking good care of your device can help prevent startup issues. Here are some tips to keep your ASUS laptop in good shape:
- Power maintenance: Use ASUS Battery Health Charging to set charging limits and extend battery life.
- Software updates: Regularly update BIOS, drivers, and the operating system.
- Safe device handling: Disconnect USB devices properly to avoid boot conflicts.
- Vent cleaning: Clean dust and debris from your computer, especially your vents. This can prevent overheating.
Asus Still Not Working? We’ll Recover Your Data
Don’t let a malfunctioning laptop get in the way of getting things done. If you’ve tried everything and your Asus laptop is still unresponsive, it’s time to call in the experts. If data recovery is a concern, our expert hard drive recovery services are here for you.


