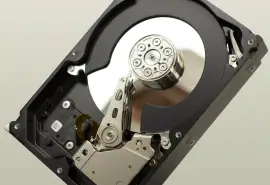
Toshiba is one of the largest storage manufacturers in the world. They are known for their reliable, high-capacity products at fair prices. However, even Toshiba hard disk drives (HDDs) can encounter issues. For that reason, users should frequently check their hard drive’s health to diagnose and resolve problems. It is critical to protecting stored data. Secure Data Recovery, the leaders in RAID, SSD, and hard drive recovery, explains common Toshiba error codes and offers troubleshooting tips.
Monitor HDD Health With TOSHIBA Storage Diagnostic Tool
Hard drive maintenance is crucial. One of the biggest aspects of maintenance involves monitoring its status. S.M.A.R.T. (Self-Monitoring, Analysis, and Report Technology) tests are an excellent snapshot of a hard drive’s health. You can test the disk or external hard drive with the TOSHIBA Storage Diagnostic Tool. The program scans the drive to check for a range of read and write errors.
To use the TOSHIBA Storage Diagnostic Tool:
- Download Toshiba Storage Diagnostic Tool from the official website.
- Install the software and accept the license agreement.
- Launch Toshiba Storage Diagnostic Tool.
- Choose the target drive from the list.
- Select the Function(U) option.
- Click Start/Stop Diagnostic Tool.
- Choose Quick Scan or Full Scan. Quick Scan searches a selected portion of the drive. Full Scan examines the entire disk.
- View the results in the Test Status column.
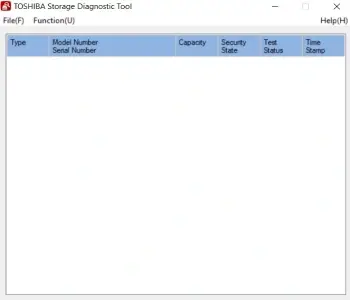
The device will display a “Pass” or “Error detected” message upon completion of the scan. “Abort” will appear after stopping a scan. Click “OK” to proceed.
Explaining Common Toshiba Errors Codes
Toshiba external hard drives are still susceptible to issues that could jeopardize the crucial data stored on them, often at the most critical times. Understanding and effectively addressing these common Toshiba hard drive errors are crucial to preserving the device's integrity and ensuring uninterrupted access to data.
This section aims to thoroughly understand these common errors, delving into their causes and presenting suitable fixes to minimize data loss risk and extend the hard drive's lifespan.
Hard Drive Not Working/Showing Up
This error occurs when your computer does not recognize the Toshiba external hard drive connected. It can prevent access to your data. Absent drive letters, outdated drivers, corrupt file systems, power failures, and dead USB ports can cause the issue.
Potential Causes of the Error:
- Absence of drive letter
- Outdated driver
- Virus attack
- Corrupt file system
- Missing important software updates
- Power failure
- Improper ejection
- Partition issues
- Dead USB port
- Unreadable disk structure
Steps To Fix the Error:
- Check Connection of External HDD:
- Ensure cable connections are secure.
- Try a different USB port or a new cable.
- Test the drive on another computer.
- Fix With Command Prompt:
- Type cmd in the Windows search box and press Enter.
- Right-click on the Command Prompt and choose Run as Administrator.
- Type chkdsk X: /f (replacing "X" with the hard drive letter) and press Enter.
- Check to see if your Toshiba hard drive is now recognized.
- Create New Partition:
- Search for Disk Management and open it.
- Right-click the unallocated space, select New Simple Volume, and follow the prompts to create a new partition.
- Update the Driver for Toshiba External Hard Drive:
- Connect your Toshiba external hard drive to the PC. Right-click on This PC and select Properties.
- Click on Device Manager and expand the Disk Drives section. Right-click the drive and choose Update Driver.
- Select Search automatically for updated driver software and follow the prompts.
- Change the Drive Letter:
- Search This PC. Right-click and select Manage, then Disk Management.
- Right-click the volume of the desired disk and choose Change Drive Letter and Paths.
- Assign a new drive letter and click OK.
- Boot PC in Safe Mode:
- Open Settings and navigate to Update & Security.
- Click Recovery, then select Advanced Startup and Restart Now.
- Choose Safe Mode from the startup options. Connect your Toshiba hard drive again and check if it is recognized.
- Initialize the External Hard Drive:
- Open Disk Management, right-click the uninitialized hard drive, and select Initialize Disk.
- Choose the desired partition style and click OK.
Preventative Measures:
- Frequently update your system and drivers.
- Safely eject the device to avoid corruption.
- Run antivirus scans to prevent malware infections.
- Perform regular backups to avoid data loss.
- Use a stable power source to avoid harmful fluctuations.
Hard Drive Detectable But Inaccessible
In this case, the computer detects your Toshiba hard drive. However, while it appears in Disk Management, you cannot access the files stored on it. This issue can prevent you from retrieving important data and can be caused by various underlying problems.
Potential Causes of the Error:
- MBR (Master Boot Record) Corruption. The MBR is essential for the drive to be readable. If it becomes corrupted, the system can detect the drive but cannot access the data.
- Input/Output Device Errors. I/O device errors can occur due to faulty connections, damaged USB ports, or issues with the drive's internal components.
- File System Errors. Corrupt or damaged file systems can make data inaccessible even though the computer recognizes the drive.
Steps To Fix the Error:
- Formatting the Drive:
- After ensuring your important data is backed up, right-click the drive in File Explorer and select Format.
- Choose the file system you prefer (NTFS for Windows, exFAT for cross-platform use, etc.) and select the Quick Format option.
- Click Start to begin the format process.
If the drive refuses to format:
- Follow this path: This PC > Manage > Disk Management, then right-click on the drive and try formatting from there.
- Create New Partition:
- If the drive shows unallocated space, creating a new partition can help make it accessible again.
- Open Disk Management by right-clicking on This PC and selecting Manage, then Disk Management.
- Locate the unallocated space on the drive, right-click it, and select New Simple Volume.
- Follow the wizard to specify the volume size, assign a drive letter, and format the partition.
- Click Finish to complete the process.
Preventative Measures:
- Regularly back up your data to multiple storage devices or cloud services to prevent data loss.
- Always safely eject your external hard drive before disconnecting it from your computer to prevent file system corruption.
- Keep your device drivers up to date to ensure proper communication between your computer and the external hard drive.
- Ensure you use functioning USB ports and high-quality cables to prevent connection issues.
- Use diagnostic tools to regularly check your hard drive's health and promptly address any issues.
Toshiba Drive Not Showing Files
This error occurs when your computer detects the drive but does not display the files and folders stored on it. It can be an alarming error code, as it may seem like the data has been lost, even though the files still exist on the drive.
Potential Causes of the Error:
- Unstable Power Supply. The connection between the hard drive and the computer may be loose, or the cable may be faulty.
- File System Errors. Corrupt file systems can make files inaccessible.
- Hidden Files and Folders. Files might be hidden, and the "show hidden files" option is disabled.
- Virus or Malware Infection. Viruses can hide, delete, or encrypt files on the hard drive.
- Hardware Issues. The hard drive or USB port might be damaged.
Steps To Fix the Error:
- Reconnect the External Hard Drive:
- Eject the external hard drive from your computer.
- Inspect the USB cable for any damage. Replace it if needed.
- Reconnect the external hard drive to the PC using a different USB port.
- Find/Show Hidden Files:
- Open File Explorer and navigate to the View tab.
- Reveal hidden files and folders by checking the Hidden Items box.
- Fix File System Using Command Prompt and Error-Checking Tool:
Note: These tools can cause data loss during the repair process. Back up data and proceed with caution before taking these steps.
Using Command Prompt:
- Type cmd in the Windows search box, right-click on Command Prompt, and select Run as Administrator.
- Type chkdsk X: /f (replace "X" with the drive letter of your external hard drive) and press Enter.
- Wait for the scan and repair process to complete.
Using Error-Checking Tool:
- Right-click on the external hard drive in File Explorer and select Properties.
- Go to the Tools tab and click Check.
- Select Scan and Repair Drive to fix the system error.
- Format the Hard Drive:
- Right-click This PC and select Manage > Disk Management.
- Right-click the target drive or partition and click Format.
- Select NTFS as the file system in most cases, enable Quick Format, and click OK.
Preventative Measures:
- Regularly back up your data to multiple storage devices or cloud services to prevent data loss.
- Always safely eject your external hard drive before disconnecting it from your computer to prevent file system corruption.
- Regularly run antivirus scans to prevent and remove malware infections.
- Keep your operating system and drivers updated to ensure compatibility and stability.
- Periodically check and maintain cables and ports to avoid connection issues.
Toshiba External Hard Drive Light Blinking But Not Working
This error occurs when the LED light on your Toshiba external hard drive blinks, indicating activity, but the computer does not recognize the drive itself or fails to function correctly. This issue can prevent you from accessing your important data.
Potential Causes of the Error:
- Physical Damage. External hard drives are delicate and can be easily damaged by shocks, falls, or other physical impacts. Listen for unusual noises like screeching or buzzing, and inspect the drive for dents or scratches.
- Connection Issues. Poor connections, damaged cables, or faulty USB ports can prevent the drive from functioning correctly.
- Driver Issues. Outdated or corrupted drivers can cause the drive to malfunction.
- Power Supply Problems. Insufficient power supply to the USB port can hinder the drive’s operation.
- File System or Partition Issues. Corrupt file systems or partition errors can make the drive inaccessible.
Steps To Fix the Error:
- Check Physical Damage:
- Inspect the external drive for any physical damage.
- Listen for unusual noises when the drive is powered on. If you hear the hard drive clicking or beeping, it may indicate physical damage.
- Check the Connections:
- Ensure your computer is connected to a dedicated power outlet.
- Use the original USB cable or try a different cable to ensure it is not damaged.
- Connect the drive to a different USB port or try it on another computer to prevent port issues.
- Update or Install Drivers:
- Open Device Manager and expand the Disk Drives section.
- Right-click your Toshiba HDD, select Update driver and choose Search automatically for updated driver software.
- Install the latest drivers from the Toshiba website if the drive does not appear.
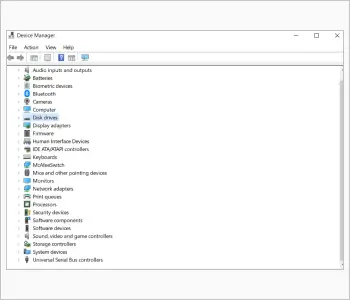
- Unhide Invisible Devices:
- Open Device Manager and go to the View tab.
- Select Show Hidden Devices, expand all sections, and right-click on grayed-out entries to uninstall them.
- Restart your computer and reconnect the hard drive.
- Activate the USB Root Hub:
- Open Device Manager by searching for it in the Start menu.
- Expand the Universal Serial Bus Controllers section.
- Right-click on USB Root Hub, select Properties, and go to the Power Management tab.
- Uncheck Allow The Computer To Turn Off This Device to save power.
- Change the Disk Drive Letter:
- Open Disk Management by searching for it.
- Right-click on the Toshiba drive and select Change Drive Letter and Paths.
- Click Change and assign a new drive letter.
- Use Command Prompt:
Note: This could lead to data loss.
- Press Windows + R, type cmd, and press Enter.
- In Command Prompt, type chkdsk /f x: (replace "X" with the drive letter) and press Enter.
- Follow the prompts to fix any detected errors.
- Check BIOS for Connected Devices:
- Restart your computer and enter the BIOS setup (usually by pressing F2, F8, or Delete during startup).
- Check the Boot Menu or Disk Information to ensure the hard drive is enabled and not password-protected.
Preventative Measures:
- Avoid physical shocks and handle the drive carefully to prevent damage.
- Ensure cables and USB ports are in good condition and provide a stable connection.
- Regularly update your device drivers to maintain compatibility and performance.
- Back up your data regularly to avoid loss in case of drive failure.
- Always use the Safely Remove Hardware option to prevent file system corruption before disconnecting the drive.
How To Fix Toshiba Read Only on Mac Error
The error occurs when the Toshiba external hard drive is connected to a Mac, and the drive is detected but is not writable. This means users can view and read the data on the drive but cannot modify, add, or delete any files.
Potential Causes of the Error:
- File System Compatibility: Toshiba drives formatted in the NTFS file system are inherently read-only on Mac since macOS does not support writing to NTFS without additional software.
- Permission Error: The drive's permission settings may be set to read-only, preventing any write operations.
- Locked or Write-Protected Drive: The drive may be intentionally or unintentionally locked or write-protected.
- Internal Errors: Formatting issues or other internal errors on the drive can restrict write access.
Steps To Fix the Error:
- Ignore Permissions:
- Select the Toshiba external hard drive icon on your desktop or Finder sidebar.
- Press Command + I to open the Get Info window.
- Expand the Sharing & Permissions section.
- Check the box for Ignore Ownership on this Volume, or uncheck and recheck it. You may need to enter your Mac's password to confirm changes.
- Unlock Toshiba Drive:
- Connect the Toshiba drive to your Mac.
- In Finder, right-click on the drive icon and select Decrypt Drive Name.
- Enter the encryption password and wait for the decryption process to complete to gain write access.
- Format Toshiba Drive:
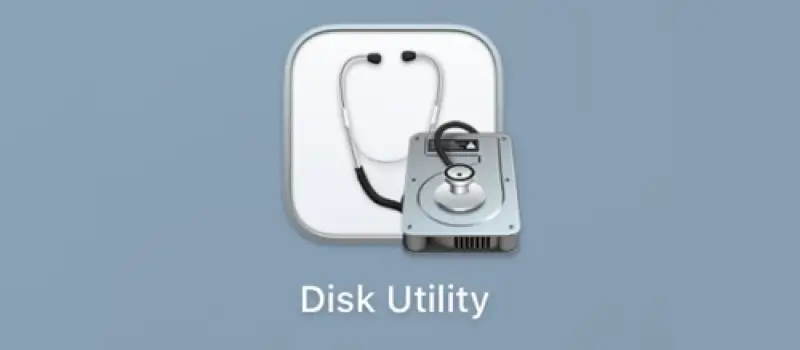
- Connect the Toshiba drive to your Mac and open Disk Utility (Applications > Utilities > Disk Utility).
- Select the Toshiba drive from the list of storage devices.
- Click the Erase button and select a compatible file system format, such as FAT, exFAT, or HFS+.
- Click Erase again to format the drive. This will delete all data on the drive, so be sure to back up important files.
- Use First Aid in Disk Utility:
Note: This could result in data loss.
- Open Disk Utility (Command + Space, type Disk Utility).
- Select the Toshiba drive and click First Aid.
- Click Run to allow Disk Utility to scan and repair any errors on the drive.
Preventative Measures:
- Regularly verify and update the permission settings of your external drives to ensure they are not accidentally set to read-only.
- Always back up important data before formatting drives or making significant changes.
- When formatting drives intended for use with both Mac and Windows, consider using exFAT or FAT32, which are compatible with both operating systems.
- Use updated software and drivers to ensure compatibility and functionality between your devices and operating systems.
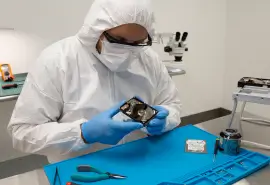
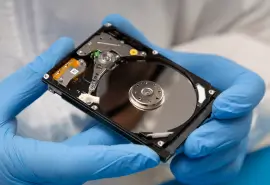
Toshiba Data Recovery
Dealing with a failed Toshiba hard drive can be stressful. While various solutions can address logical errors, they may not work with viruses, malware, physical damage, or mechanical failures. Despite their reliability, Toshiba storage devices are not immune to failure.
In such circumstances, Secure Data Recovery understands the stress and urgency of inaccessible or damaged hard drives and the importance of your data. Specializing in Toshiba data recovery, our team possesses the expertise and advanced tools needed to safely restore essential data following hard drive failures or other catastrophic events. Our engineers work in state-of-the-art labs and maintain a remarkable 96% success rate. Our No Data, No Recovery Fee guarantee ensures you only pay if we successfully recover your data.
Contact us today at 800-388-1266 to speak with a specialist and start the recovery process.