When it comes time to remove a hard disk drive (HDD) from a laptop, beginners often do not know what to do. However, removing hard drives from laptops is straightforward. Some want to upgrade to a new hard drive for more disk space. Others must send the old hard drive to a professional service to recover data.Secure Data Recovery, the authority in RAID, SSD, and hard drive recovery, presents a step-by-step guide for hard drive removal.
3 Simple Steps for Removing Laptop Hard Drive
In most cases, removing the internal hard drive from a laptop can be done within 15 minutes.
While these instructions are tailored to minimize potential data loss, accidents can happen. Modern HDDs are delicate devices. Mishandling could damage the drive’s platters.
Before starting, users should determine if the data on a functioning drive is valuable. If it is, consider transferring those files to an external hard drive or flash drive. A cloud backup is another option if an external drive is unavailable.
Follow the steps below when finished with the data transfer.
You might need a screwdriver, depending on the laptop model. Remember to set the screws aside.
(Disclaimer: Removing the laptop’s hard drive can void warranties.)
Step 1 - Preparing for Removal
Shut the laptop down. Disconnect the power cable and all USB cables. You could be electrocuted if the laptop is plugged into a power source.
Then, examine the bottom of the laptop. Most manufacturers place the laptop battery along the back. To remove, slide and hold its release latch.
Press and hold the power button for 15 seconds to drain the remaining electricity and prevent unexpected shocks.
Step 2 - Removing Parts
Inspect the bottom of the laptop for the main access panel. Sometimes the panel is found on either side of the laptop. Once located, unfasten the screws to reveal the hard drive.
(Note: In rare cases, the panel is positioned under the motherboard. Enlisting an expert is recommended in these instances.)
Various manufacturers limit movement with an additional mechanism beneath the panel. You must either unscrew the hard drive’s mount or unlock another latch to release it.
Step 3 - Freeing the Drive
Pull the hard drive from the connectors. Be careful not to damage them during separation. Inserting a new hard drive is impossible with damaged connectors.
Loosen the screws on the hard drive bracket if needed. Most models have two or four screws near the corners of the drive.
Congratulations! Your hard drive should be free.
To protect personal data, adhere to proper data destruction procedures if discarding the hard disk.
If shipping to a data recovery service, put the old hard drive in an anti-static bag. Tape the drive to the inside of the bag to prevent slipping or an accumulation of dust or moisture. Envelop the device in five or more inches of bubble wrap.
Bonus - Installing New Hard Drive
For the most part, installing a new hard drive or solid-state drive (SSD) into the compartment is a matter of reversing the steps and reassembling components.
That said, users must complete several unique steps before using the laptop again.
Prior to purchasing, ensure the replacement fits hardware requirements. Different setups will often cause startup problems. Consult the laptop’s manual to verify compatibility.
You also must reinstall an operating system like Windows for the laptop to start. There are two ways to reinstall the operating system.
First, users can install Windows onto the new HDD before putting it in the laptop as long as the old hard drive still works.
The following steps describe how to reinstall Windows using this method:
- Connect the new drive to an enclosure or SATA-to-USB adapter.
- Plug it into one of the laptop’s USB ports.
- Open This PC application and see if the connected drive shows. If it does, skip to Step 7. If the drive does not show, continue with Step 4.
- Open Disk Management in the Control Panel and wait for an Initialize Disk box to appear.
- Select Disk 1 and OK.
- Right-click on the unallocated space, select New Simple Volume, then follow the on-screen instructions.
- Install disk cloning software to move important data, including the operating system, to the new device.
- Remove and replace the drive after the cloning process finishes.
Fortunately, reinstalling Windows is easy for users without a functioning hard disk to clone.
You can visit the official Windows software download website for the most recent versions and create installation media.
To create a bootable drive:
- As an administrator, select Run on the Media Creation Tool.
- Read the license terms. If the terms are agreeable, click Accept.
- Select Create installation media for another PC when asked what to do. Press Next to proceed.
- Pick the appropriate edition of Windows and architecture.
- Choose USB flash drive.
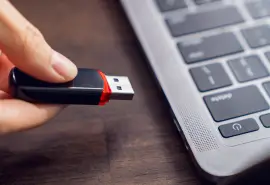
- Attach a blank USB drive with at least 8 GB of space. (Warning: All files on the drive will be deleted if it is not blank.)
- Select the USB drive and click Next.
- Hit Finish when the installation is complete.
At this point, insert the bootable drive into the laptop.
- Start the laptop. (Note: If the laptop does not boot from the USB drive, change the boot order in its BIOS.)
- Select language, time, and preferences, then click Next.
- Confirm with Install Windows.
The laptop should be as good as new when Windows is finished installing
How to Remove a Hard Drive From a MacBook Pro
MacBook Pros are among the most popular laptop models on the market. While the removal process is similar, there are notable differences. (Disclaimer: Unauthorized work on a Mac will void Apple’s warranties.)
To remove a MacBook Pro hard drive:
- Shut the MacBook Pro down.
- Disconnect cables and unplug from power sources.
- Flip the laptop, so the logo rests on the surface.
- Loosen the screws.
- Lift the back cover off the chassis.
- Locate the HDD in the bottom-left corner of the laptop.
- Unfasten the black screws on the bar and detach it from the device.
- Pull the tab to remove the hard drive from the MacBook Pro.
- Separate the bar on the side of the hard drive case.
Reverse these steps to place a new drive in a MacBook Pro.
Troubleshooting
Sometimes things happen.
You might encounter resistance when removing the hard drive. Be patient. Check for elusive screws. Do not use excessive force during removal. Doing so endangers the hard disk.
Consider changing tools or taking the laptop to a specialist if screws are stuck or stripped.
Make sure to reattach each screw to the right place. Keeping the screws in a container near their original hole can help.
For other issues, review the laptop’s documentation.
Laptop Hard Drive Removal
Removing a hard drive from a laptop is simple. It does not require an advanced understanding of computer hardware. It just requires meticulousness and fifteen minutes.
Users should exercise caution throughout the process.
If possible, create backups of critical data before removing the device. Doing so could preserve files in the event of an accident. During removal, handle the HDD with care. After removing the disk, commit to secure destruction and disposal methods.
Whether upgrading a hard drive for performance or sending one to a service for laptop data recovery, trust the advice and expertise of professionals.
Since 2007, Secure Data Recovery has resolved over 100,000 cases of media failure for large institutions, small businesses, and individuals. Our wealth of experience with hard drives enables us to deliver results for our customers. We have seen it all.
Call us at 800-388-1266 or visit one of our stores to get started.


