An iPhone backup is vital for users looking to recover data after an upgrade, hardware failure, or factory reset. This procedure ensures that valuable data like contacts, photos, messages, and apps are restored to the device. The backups also maintain personal settings and preferences. Whether setting up a new iPhone or recovering from technical issues, knowing how to restore an iPhone from a backup is essential.
The experts at Secure Data Recovery, an Apple Authorized Service Provider (AASP) specializing in professional iPhone recovery, explain how to restore an iPhone from a backup.
What Is an iPhone Backup
A backup copies all data stored on an iPhone at a given moment. This snapshot can be crucial when you upgrade to a new model. It also helps if you experience data loss due to physical damage, logical errors, or device loss or theft. The peace of mind of knowing your iPhone’s data is secure is often priceless.
There are two primary methods for backing up an iPhone. You can use iCloud on an iPhone or a computer with iTunes or Finder.
iCloud Backups: Apple stores iCloud backups in cloud storage. They are often completed automatically when the iPhone is locked and connected to Wi-Fi and a power source. This method backs up almost all data and settings on the iPhone, but it does not include data already stored in the cloud, such as contacts or notes.
Note: iCloud is technically a synchronization service. It is designed to share data across multiple devices in the Apple ecosystem. As a result, deleting data on the iPhone will also erase it on iCloud. Therefore, iPhone users should exercise caution when managing data if iCloud is their primary backup.
Local Backups: For those who prefer local backups, iTunes (on Windows and older Macs) and Finder (on Macs with macOS Catalina or later installed) offer an alternative. These backups are stored on your computer, providing security for those wary of cloud-based solutions. Unlike iCloud, iTunes and Finder backups can also include saved passwords, Wi-Fi settings, website history, and health data. However, they require manual intervention and connection to a computer, making them less convenient than automated iCloud backups.
Most users opt for iCloud backups and allow them to operate in the background. iTunes and Finder backups are a more complete but more involved method of backing up an iPhone.
Regardless of your backup method, users should ensure their backups are current before attempting to restore an iPhone.
To check the last successful backup for iCloud:
- Open Settings.
- Tap your Apple ID.
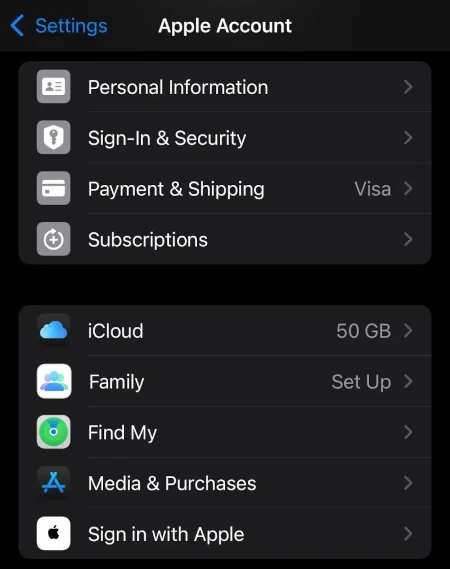
- Select iCloud.
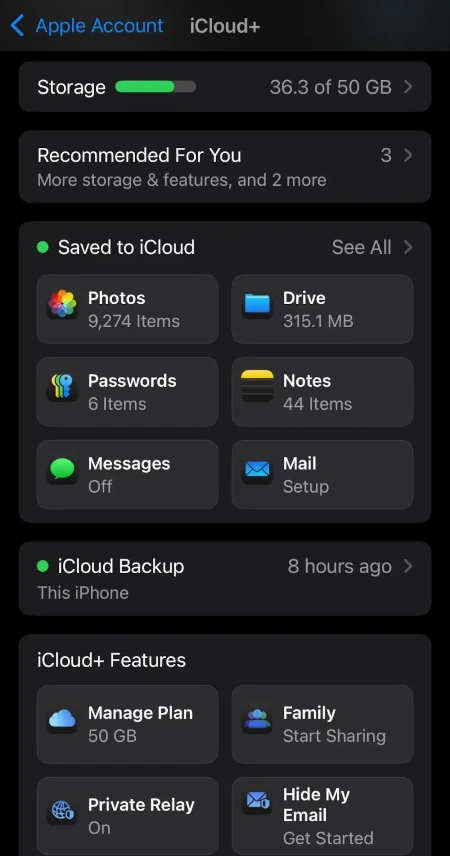
- Select iCloud Backup.
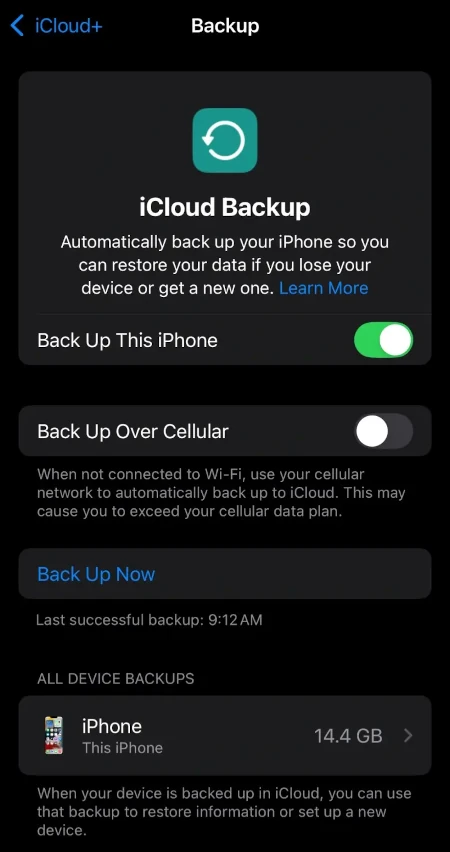
- Confirm the date of the last successful backup.
Next, check the storage space on your iPhone. The amount of data restored must not exceed the available space on your device. If the backup is larger than the target iPhone's capacity, it may be necessary to free up space by deleting unnecessary files or apps before backing up.
Restore iPhone From iCloud Backup
Restoring an iPhone from an iCloud backup is a straightforward process. It is ideal for getting the device back up and running with your data, settings, and apps intact.
Here is how to restore an iPhone with an iCloud backup:
- Begin the setup process. Turn on the new or restored iPhone to be greeted by the Hello screen. Follow the on-screen instructions until the Apps & Data screen appears.
- Restore an iCloud backup. On the Apps & Data screen, choose the Restore from iCloud Backup option.
- Sign in to iCloud. Use the Apple ID linked to the backup you intend to restore.
- Choose the relevant backup. Typically, it is the most recent one from the list of available backups. The time and date of each backup are displayed to help you decide.
- Start the restoration process. After selecting the backup, the restoration process begins. The iPhone will start downloading all the data from iCloud, including apps, settings, and personal files. The time this takes depends on the size of the backup and the speed of the internet connection.
- Complete the setup. Follow any additional on-screen instructions to complete the setup of the iPhone.
If the restoration process seems slow, it is likely due to the speed of the Wi-Fi network the iPhone is connected to. Sometimes restarting the router can improve connection stability, but connecting directly via ethernet is possible with the correct adapter. If some apps or data are missing after the restoration, it could be due to interruptions in the internet connection. In this instance, it may be necessary to manually redownload apps or erase the iPhone and restore from the iCloud backup again.
Restore iPhone From iTunes Backup

- Launch iTunes on the computer and connect the iPhone to the computer. Follow the on-screen steps if iTunes shows a prompt to enter the device passcode or to Trust This Computer.
- Select the iPhone. Look for the iPhone icon in the upper-left corner of iTunes and click on it.
- Choose the backup to restore. Click Restore Backup under the Backups section. Choose the most relevant backup by looking at the date and size of each backup file.
- Start the restore process: Click Restore and wait for the process to complete. Keep the iPhone connected to the computer until it restarts and syncs with the computer.
Restore iPhone From Finder Backup
- Launch Finder. Connect the iPhone to the Mac using a USB cable. Open a new Finder window.
- Select the iPhone. The iPhone should appear under Locations in Finder. Click on it.
- Start the restore process. Click Restore Backup in the General tab. Choose the preferred backup to restore. It is typically the most recent one.
- Complete the restoration. Click Restore and wait for the process to finish. Keep the device connected until it restarts and syncs with the Mac.
What To Do After Restoring iPhone Backup
After restoring an iPhone from a backup, it is essential to ensure all its data is available. Start by checking contacts, messages, photos, and apps to verify that they are present and up to date. Also, review settings to confirm that preferences like Wi-Fi networks, notifications, and any custom configurations are restored.
If it seems that data is missing, a few steps can help:
- Restart Your iPhone: A simple restart can often resolve minor glitches, refresh the system, and allow data to appear correctly.
- Check iCloud Sync: Ensure the device is correctly logged into an iCloud account and that sync settings for specific data types like contacts or calendars are enabled.
- Redownload Apps: Redownload apps from the App Store if they are missing. It should restore the app data included in the backup.
- Recheck Backup Sources: Confirm that the iCloud backup was complete and up-to-date or for iTunes/Finder backups. Ensure you selected the correct backup file.
- Consider Alternative Backups: If the primary backup does not restore data as expected, consider using an alternative backup.
These post-restoration steps ensure the iPhone is fully functional while keeping all necessary data intact.
When To Seek Professional Assistance
Certain situations might present challenges requiring professional intervention.
Secure Data Recovery offers specialized Apple data recovery services to address complex issues beyond standard errors. We employ Apple-certified technicians who specialize in retrieving lost files from iPhones, among other Apple devices.
Our expertise includes corrupted backups that fail to restore properly. We can also help with incomplete restorations, persistent errors, or inaccessible backups. Failed attempts, especially those that repeatedly halt or fail, could indicate deeper underlying hardware problems or severe data corruption. Trust the Apple Authorized Service Provider with advanced tools and techniques and a risk-free process to regain your data.
Call 800-388-1266 or request help to receive a free quote along with a No Data, No Recovery Fee guarantee.